A Focus On Food: Our Tricks And Tips Behind Food + Beverage Photography
Most people don’t think about the way food is photographed – they think about how it will taste! But ask any professional photographer that has worked with food or beverages, and they’ll tell you that there’s a litany of tricks and tips to making food look delicious and distinctive. From Hollywood trickery to spatial geometry – we’ve put together a list of our own to help you capture your next meal with expert-level elegance.
- Choosing the right background for the food at hand
Not all surfaces and backgrounds are photogenic. And while others might be beautiful on their own, they still may not necessarily complement the food/beverage at hand. So, what are some factors to consider when selecting a background? Color is a big one. Ideally, you want to avoid overly-bright colors or busy patterns that will distract from your subject. A shiny surface probably wouldn’t be a good choice either. Using neutral or pastel color palettes can go a long way in making your food/beverage ‘pop’- in a similar way that a certain color might bring out a person’s eyes. For instance, if most food contains warm color tones, it might be a good idea to shoot against cool-toned surfaces to create a pleasing contrast. If you want to learn more about how to create ‘color harmony,’ check out this helpful article on the subject, which also includes some useful guides.
You can also use the background to express character, suggest a mood, or establish a sense of place. Here’s a photo taken by Studio 3’s very own David Bell, which showcases a delicious chocolate cake placed in a rustic environment. The flooring suggests farm-style, naturalism, organic ingredients etc., while the rich brown tones in the wood compliment the chocolate perfectly.

- Knolling style – to use or not to use?
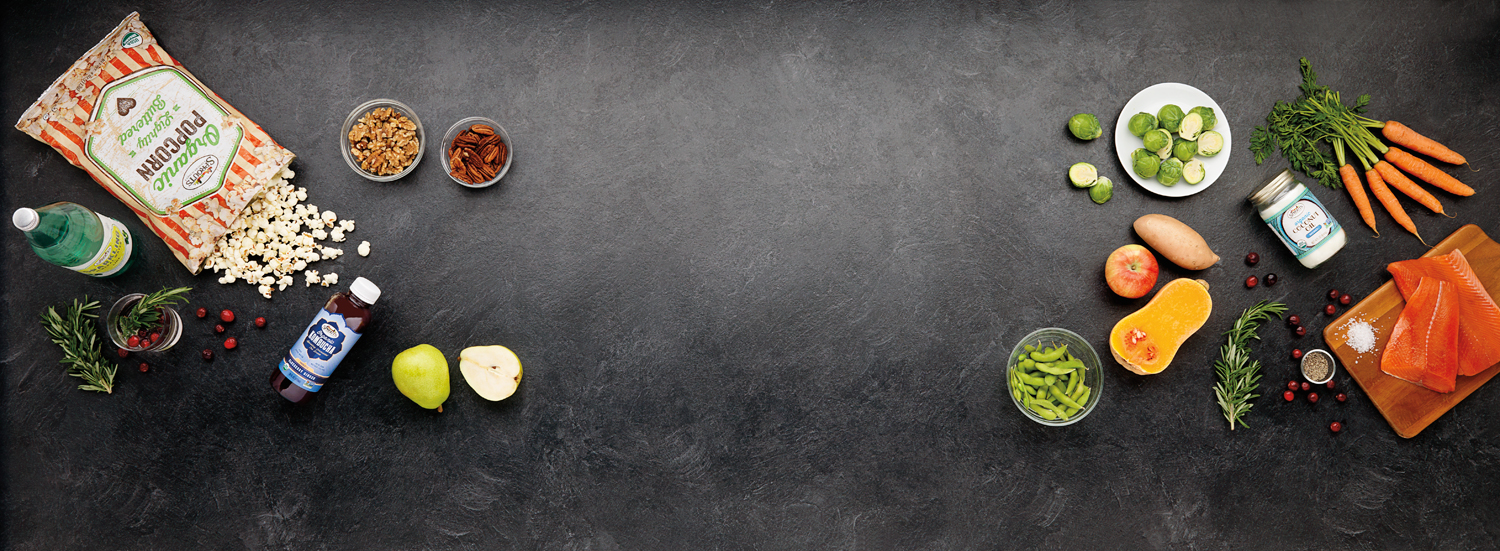
You may not be familiar with the term, but you’re definitely familiar with the style. ‘Knolling’ refers to this style of photography:

Bright + even lighting, Birds-Eye point-of-view, and a meticulous arrangement of items. First popularized in 1987 by a janitor who would fastidiously arrange the various construction tools he found around the warehouse, ‘Knolling’ photography has recently taken over Instagram as one of the most prolific trends in recent years – and has also found a strong niche in food/beverage photography. It’s easy to see why: if executed correctly, Knolling photography has a unique way of making any subject look bold and dazzling – even if it’s just some popcorn. Right angles, clusters of color, and clean/crisp lines are the name of the game. An appreciation of image composition, as well as the spatial relationships between objects will help your Knolling photography soar.
- Using mist, glycerine, and other fakery
Want that ultra-fresh, dripping condensation look? Simply hit your glass with some mist! Or even better yet, many professionals will use Glycerin to the same effect. It gives your food/drinks a cold, fresh look, which in turn makes them appear more delectable. This is especially true of foods like fruits and veggies. If you see food in photographs looking wet or frosty, then you can bet your top dollar that glycerin was used! Think of your classic vending machine: can you picture those big water droplets rolling off a cold can of Coke on the front image? Yup, that’s either mist or Glycerin.

If your image requires ice, we highly suggest the use of fake ice cubes. Obviously, real ice melts, thus requiring frequent re-sets, which can take time and money away from your project (and also make a mess!). If you happen to be using glass, real ice will also cause significant fogging, obscuring your subject even more. These are just a few of the reasons professional photographers have embraced the use of fake ice and other perishable food prop replacements.
- Styling: Paint, pins, and putty
 It takes a fine touch. There are countless cosmetic steps food stylists can take to improve the overall quality and composition of your food/beverage photography. Remember, we’re not actually serving the food, so no need to shy away from using un-edible items to get the necessary shot. Metal pins, for instance, can be used to hold food in place if you want to display the perfect balance of ingredients without them falling over. Photographer and food stylists will also use non-stick putty to the same effect, like so:

Ultimately, it’s about arranging and styling your subject to maximize it’s photogenic potential. Is your food stackable, or should it be fanned out, serving style? Does your subject have green stems? Should a side dish be included? What about some unique serving flatware? You can even utilize acrylic paint to boost colors, cover up blemishes, and even create patterns if desired. Get creative here! Like any good dish, there is a lot more to the finished product than merely the sum of the individual parts. It’s about how they all interact!
Here at Studio 3 Inc., we not only specialize in food and beverage photography, but also portraiture, lifestyle, sports, and product photography. Since 1974, we’ve been making your photography dreams come to life! Partner with us for your next creative endeavor, and see just how we stay inspired.